Thursday, 19 January 2017

AI

Basics - When the player is inside the casino I wanted to try and have a bodyguard who attacks you. This simple AI will only to sense the character and follow the character. While there is other more advanced AI like pathfinding which works out the faster rate for point A to point B without bumping into walls or running into tables. Behaviour tree allows the AI to make to use basic logic on how to act to different events. In the end, I felt like the bodyguard doesn't need to be complex as it only needs to sense the character and follow.


How-  I watched a tutorial called 'How To Create AI And Enemy Basics' (Virtus Learning Hub / Creative Tutorials, 2016) which explained out to make a basic AI. I started off with creating a character class and added pawn sensing to the enemy. Within the blueprint I made this code 'OnSeeSapwn' then I cast it to third person character. So this only work when the character is sensed. Next, I added the node 'AI Move to' which makes the move where ever the Character is. 
After creating simple AI, I needed to code which allow the player to be able to kill the enemy. With the enemy, I added a trigger box called 'Killbox'. Next, I have made a 'BeginOverlap' event and linked that to a gate. The function is if the character is in trigger box and presses 'E' the enemy will be destroyed. 

Testing-

Testing this I felt that it was too easy as the enemy is following you, just press e and you're fine. I needed another function for the enemy. My original plan was for the enemy to die and the star which the player needed to collect would spawn from his body like loot. Instead, he will be guiding the star which I have changed to a poker chip. When you get next to him he will push you away. 

The reason why I have done this is that I made most, the amount of sense with the AI I have coded. The blueprint below is how the enemy pushes the character away. I created a custom event within my third person character and reference it in the enemy's blueprint here. Next, I have a node that launches the character with other nodes to randomise the position you are launched in. 


Why - Designing with the flow channel in mind I wanted to introduce the player to an enemy but this enemy can't harm you as you can't harm him. If I was able to create this prototype into a full game this would be how I first introduce the character to the concept of facing enemies and give the character a safe environment to interact with the enemy. The enemy gives the level more life than just yourself, which Add immersion. 


Industry expectations


Usability in games. While limited in function this is a good start for getting AI which is usable within a game. I would re-use this blueprint and add more functions to it. This blueprint is a good foundation for AI in a platformer style game but would lack any use in open world games. 


 This blueprint only refers to third person character. If this code had errors it would affect the player character which is a downside but it's independent of the rest of the blueprints and wouldn't effect the open level blueprint.

This blueprint is efficient because it doesn't have any unnecessary add-ons or nodes that don't need to be there.This is the fastest and least costly method of creating simple AI.


Ready made libraries - Pawn sensing was a crucial part of this enemy. I could have made AI without that ready-made code from the actor class.


Re-usability - If I was going to make more enemies that just followed the player I was re-use this blueprint it's easy to change to suit a new character and enemy. While I would be better if it made more function and complex AI. It still functions, it's easy to adapt and all correctly named.


Time management 

As I have now finished my first prototype and completed my second deadline. It's time to look at my time management. Looking at my taskboard I sadly haven't been able to stay on target as I wasn't able to complete Instantiation, Loop or Arrays. I will have to add those tasks to my second prototype section on my taskboard. Other than that I have been able to complete most of the task before the deadline which is a great sign of progress. I am not worried about the progress I'm at, so I can now move on to my next prototype. 


Bibliography

Virtus Learning Hub / Creative Tutorials, (2016). How To Create AI And Enemy Basics - #42 Unreal Engine 4 Beginner Tutorial Series. [online] YouTube. Available at: https://www.youtube.com/watch?v=3GV6-4uhkYc&t=1s [Accessed 19 Jan. 2017].

Friday, 13 January 2017

Snow

Basics - For this prototype to type out new concepts and editors within the unreal engine. So I decided to try out making practice effects like snow.

How-  This practical effect will need to made without using anything from the starter content. I had to find guidance on how is the best way to make snow. My original plan was to make snow within the code itself and have the snow spawning into the level and using loops to loop the snow fall. Thankfully I found a useful tutorial called 'Unreal Engine 4 Tutorial - Creating a Snow Particle System' (Jones. S, 2015). This tutorial showed me how to make a practical using the emitters editor within unreal engine. I first needed to create a snow flake in photoshop.


Next I need to make the snow flake into a material and use that material within the emitters editor. In the image below it shows what this editor is like. The main use in is the options under the material like, spawn, initial location, initial rotation, initial size, est. These options help edit the fall rate, the way the snow moves, the rate of how many is fall and the like to allow me to decide correct movement of snow.


Why - I wanted to give the level an aesthetic appeal. I felt like the level was to still without the snow falling. As I have focus on the mechanics and functions of the game play, I felt that I need to focus on the aesthetics to add to the overall game experience.

Industry expectations - While I could of got with my original idea of using blueprints to create my snow effect. I realise that would have  game data that didn't need to me used up and my own time to make the snow. Making an emitter only could 20 minutes to create, while I imagine coding snow would have taken a lot longer to get running.


Re-usability - I have re-used this emitter in the second level outside, With little to not editing of the emitter I can use this for any snow level in a game I want. So this emitter is valuable for re-usability.


Bibliography

Jones, S. (2015). Unreal Engine 4 Tutorial - Creating a Snow Particle System [1/2]. [online] YouTube. Available at: https://www.youtube.com/watch?v=3cnRh_sE1x8 [Accessed 13 Jan. 2017].

Thursday, 12 January 2017

Conditional statements


Basics - In prototype 1 there are two switches which activate the casino door to open. As this is the objective for the first level I needed to work out how to create a functioning switch using blueprints.

What - First I needed to remind myself how conditional statements work so I research online and found this website called  'If Statements in C' (Allain, A.2011). This was a good basis to find me when designing these functioning switches.

How-  
With help from another student, I was able to out how to a blueprint count the number of switches activated. I first created a custom event called 'Increase Switch count' to reference within the open level blueprint. Next, I created two variable: Switch count and Quota.The 'switch count' counts the number of switches that have been activated. The Quota is the number that has to be meant, so for this quota, the number '2' has to achieved for the quota to be meant. The Quota variable tells the branch node if the quota has been meant. If the quota is meant true then move door position.

The door didn't want to move but because I put 'Print string' into the switch count I could tell that the blueprint was working. I decided that it was something to do with the position movement part was the problem. So I got rid of it and decided to destroy actor.

The next issue I had was when I was making the blueprint within the open level blueprint. I was having issues trying to get the 'Increase switch count' custom event within the open level blueprint. I tried 'Get All Actors of Class' and choose 'Casino Door' next I made a get node and 'cast to Casino Door' to get the custom event. Sadly there was an issue with the cast node.

I realise I didn't need the 'cast' node as 'Get All Actors Of Class' and referencing my custom event was enough to get my it working. 
To make it a conditional statement that counted the switches activated I connect the two play camera matinee nodes to the Increase switch count. So when the player activated the matinee that would count for 1 in the switch count variable. When 2 are activated then the quota has been meant and that destroys the door.


Why -  While he suggested an easier way to do this function was to have it when the player activates one switch it would open one-half of the door and the other switch would open the other half. This would have been a faster and easier way of coding this function but I wanted to demonstrate conditional statements using the switches.

Industry expectations - 
Naming conventions and formatting helped me with this blueprint. As I was referencing a custom event in the open level blueprint I needed to make sure that I had a suitable named for class and event. I wanted to make sure it was clear what was happening in the blueprint to I formatted the open level blueprint into three parts, the two parts for activating the switches and the third that reference the custom event which had the conditional statement. 


Ready made libraries - Within the open level I couldn't reference the custom event on it's on but with the ready made code like 'Get All Actors of Class' allowed me to get the custom from my 'Casino Door' blueprint to the open level blueprint. 

Re-usability - This blueprint is too dependent on the variables and trigger boxes I made within this project to be easily copied on any other project. Yet there are parts that I have myself which used in my next level. I used a similar layout with similar variables which had a conditional statement if true would destroy the object.


Bibliography 
Allain, A. (2011). If Statements in C - Cprogramming.com. [online] Cprogramming.com. Available at: http://www.cprogramming.com/tutorial/c/lesson2.html [Accessed 12 Jan. 2017].

Ice Physics

Basics - For my first prototype I will be displaying programming concept of physics through the ice. When the player walks on the ice there movements will be slippery. For this, I need to edit the character's movement when he collides with the trigger box. 

What - To start with I need understand how I to create ice physics within my level. So I looked up methods of doing this on the internet. I was able to a forum which asked  'How can I make a character slide on ice?' (Answers.unrealengine,2015). Which showed me how to change the character's movement when on the ice. Another forum which asked 'ground friction setting not doing anything in first person template?' (Forums.unrealengine,2015). While not the question I was asking for but it did give me to important nodes within the Character blueprint called 'braking deceleration walking' and 'Ground friction'.


How-  I first needed to create a custom event which I will need to reference in the ice volume. Then I needed to cast to 'IceVolume' so this blueprint effects Ice volume's blueprint. Next, I set the deceleration walking to '0' and the ground friction to '0.4'. For Off Ice custom event I have set the deceleration walking to '2045' and the ground friction to '1'. The reason why is that I want the character movement to be different when he is on the ice to when he is off the ice. Finally, I linked all of the set variables to Character Movement so they will affect the character's movement.

After I wrote the blueprint within the 'Third person character' blueprint, I needed to reference the custom events within the 'Ice Volume' blueprint. The blueprint below shows when the character begins overlap play 'On Ice' event. When the character ends overlap play 'Off Ice' event. 


Where - I am using this Ice volume blueprint on the two platforming puzzles to make them a challenge. I have created broken pieces of ice which the player has to jump from one to the next.

Why - To add the aesthetics of the winter with the snow practices and now ice. I wanted there to be a theme of winter and use this theme as a part of the gameplay. I make the pieces of ice white as a semiotic of the ice itself so the player would understand what they were. I could of make the ice physics in a different way like make the ice volume itself create slide movement. It was faster and easier to make the ice volume activate the custom event within the character blueprint itself than the other way round. 


Industry expectations - 

 Maintainability of this blueprint is easy to restore. If there is something wrong with the custom event I can break the links within the 'Ice Volume' blueprint to check what is wrong without affecting the rest of the game. I can also edit the 'deceleration walking' and 'ground friction' rate if there is a problem with the character's movement.

 This blueprint is dependable. The set custom event connected to begin overlap mean the blueprint has to work when the character overlaps with the trigger box. The overlap triggers the event. I have also made sure that the character will return to normal when the overlap end as I have create a custom event for when the character is off the ice. 


Ready made libraries - This blueprint won't work without the use of ready-made nodes from the character class. Within the character class, I used 'deceleration walking' and 'ground friction' to change the movement of the character. This won't of worked in the other classes like actor or hub. 


Re-usability - I was able to duplicate the trigger box to use on the other side of the level. That means that within this Unreal project I could re-use this blueprint as much as I want. Whereas if I wanted to re-use this blueprint in a new project, I would only need to make to sure I use the same names for the blueprints and paste in the right place and it would work just as well. While I wouldn't use this in any game, could use this whenever there is ice in a game. What makes this great for re-use this the fact that I can edit the 'deceleration walking' and 'ground friction' rates for what I want.


Bibliography

Answers.unrealengine, (2015). How can i make a character slide on ice? - UE4 AnswerHub. [online] Answers.unrealengine.com. Available at: https://answers.unrealengine.com/questions/311998/how-can-i-make-a-character-slide-on-ice.html [Accessed 9 Jan. 2017].

Forums.unrealengine, (2015). ground friction setting not doing anything in first person template?. [online] Forums.unrealengine.com. Available at: https://forums.unrealengine.com/showthread.php?66455-ground-friction-setting-not-doing-anything-in-first-person-template [Accessed 9 Jan. 2017].


Tuesday, 10 January 2017

Cinematics

Basics -
To help with player understanding and designing the game to get the player to their attention to the objective: I needed cinematics. As I have never had a cut scene before I needed to research how it is done within the Unreal engine. 

What - I used this tutorial 'Unreal Engine 4 Beginner Tutorial Series' (Virtus Learning Hub / Creative Tutorials,2015) to understand how to make cinematics within the Unreal engine. The reason why I used this tutorial was to get the knowledge so I would be able to make cinematics for myself. 


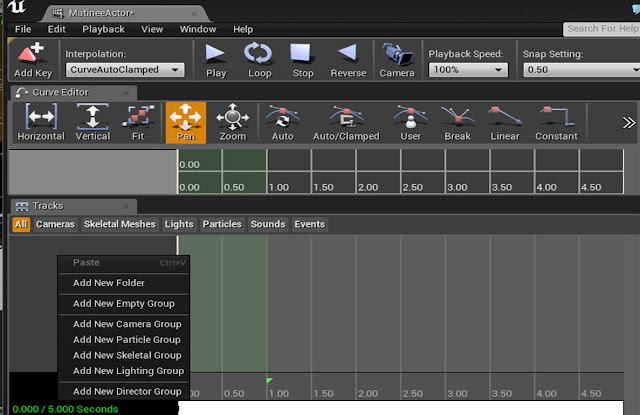
Method - I started by creating a matinee, then within the matinee, you can set up a camera group Now you are able to animate the camera's movement and set the time of the cinematic. Finally to make sure that in the game it switches from Character's camera this is matinee camera I need to make a director group and keyframe the camera you want to be on. 


How- To understand how to create a switch that activates a matinee I wanted to see how a tutorial does it, so I watched 'Open a Door with the E Key'(The 3D Tutor,2015). I created this blueprint below to trigger the matinee cinematic. I first made a box trigger which in the blueprint is called 'SwitchTrigger'. When the character overlaps the box, the player is able to 'Enter' the InputAction Interact. This is my custom input there you have to press E. When the player enters the correct input within the 'SwitchTrigger' the output will activate the matinee. 


Where - I used this cinematic matinee when the player activates a switch. There are two switches in the level which use this cinematic matinee. I also used it for the 'Game Over' screens and 'End of Prototype' screen. I looking back I could have used made the 'Game over' screens using a Hud which would have looked better and take less time to make. 


Why - My own overall game design philosophy inspired by Fumito Ueda concept 'Design by subtraction'. I could have explained that turning the switches on would activate the door to open but I wanted the player to work out what to do on their own. I could have designed a hud to show how many switches are activated but I feel like the cinematic get the point across in a clear and simple way. I subtracted the other more advanced methods because I felt that this was a clear way of showing and telling the player what they have achieved. 


Industry expectations - 

 Maintainability of this blueprint is good because once I have made it will not interact with any other function or interfere with any blueprint. Once this blueprint works I don't need to edit it later down the line and as it is independent of other blueprints I don't need to worry about it causing issues.

 Dependability of this blueprint is that it's simple and pins down the basic function. I choose the method that cost less time to make and has a straightforward logic to it. If the character is in trigger box 'open' gate node. In gate node, if the player enters 'E' then exit gate node and play matinee. 


Ready made libraries - I was able to use the reference to the matinee from my scene within the open level blueprint. This function of referencing an actor isn't possible within a set blueprint, for example, I couldn't reference this matinee within a character blueprint. Gate is another made node where instead of me having to set 'if the input is entered then activate matinee. The gate allows for me to set the open, close, enter, and exit of my blueprint.


Re-usability - This blueprint is easily re-usable, in fact, I re-used it myself. As I have two switches I needed basically the same function to happen. I was able to duplicate the script and change want I needed like which trigger box I was referencing and what matinee I am referencing to get it to work. 


bibliography

The 3D Tutor, (2015). UE4 Tutorial - Open a Door with the E Key (Matinee Sequence & Blueprints). [online] YouTube. Available at: https://www.youtube.com/watch?v=tm5QZiqVdwI [Accessed 9 Jan. 2017].

Virtus Learning Hub / Creative Tutorials, (2015). Unreal Engine 4 Beginner Tutorial Series - #26 Matinee Introduction. [online] YouTube. Available at: https://www.youtube.com/watch?v=eR0X9Rb08KY&t=1s [Accessed 9 Jan. 2017].

Monday, 9 January 2017

Changing colour


Basics - I wanted to have two lights change on the casino building. These lights would change then the player activates one of the switches. I couldn't figure out a way of doing this myself, so I found a tutorial called 'UE4 Tutorial | Change / Animate Material Colors In-game' (Ormstad, B.2015). This tutorial example how to change a colour of an object using materials. 

How-  Sadly I wasn't able to use this on a light but I could have a box represent a light on the casino. First I need to make two materials within the Unreal engine. I created the 'Base_Colour' which is red and the 'Change_Colour1' which is green. I want my red light to which to green.  


Next, I create a matinee and create a group, to that group add 'Vector material parameter track'.Then I need to add a keyframe and set the start keyframe to 'Base_Colour', then at the end keyframe set the colour to 'Change_Colour1'. I was able to get this working first time.


Why - These boxes are placed by the door to show that when the switch is activated it's doing something to the door. I wanted to use semiotics to show the players that they have activated something. On most technology red means off and green means on. I wanted to use the same logic for the lights by the door. If the player activated the switch and nothing happened. The player may be annoyed that the switch was 'useless'. Even for colour blind people, the changing colour goes through a transition from red, to light orange, to light, to green. This transition means that most people will be able to notice a change in colour.


bibliography

Ormstad, B. (2015). UE4 Tutorial | Change / Animate Material Colors In-game. [online] YouTube. Available at: https://www.youtube.com/watch?v=0XoFKCoU6-0 [Accessed 9 Jan. 2017].

Wednesday, 4 January 2017

Collision detection and handling

Basics - As I have designed my prototype to include a lot of trigger events and to move the game along, I felt it was important to understand the types of collision within the unreal engine. In reflection on collision detection and handling is a simple yet important part of game programming.  For example, I plan to use collision detection when the player collides with the icy water and the collision handling will be on collision kill character. 

What - Reading up on Collision detection and handling (unrealengine,2014). Helped me understand how I use these concepts in my own prototype. I learnt of the different types like trigger box - which allows a function to occur when overlap happens, blocking volume - which is an invisible box that has collision, so you can't walk through it (i.e. an invisible wall used it a lot of games), nav mesh bounds - this means that the enemy will be able to navigate only through bounds of this box, and Kill Z Volume - once the character begins to overlap with is box, character is destroyed. 


Method - The method I want demonstrate collision detection and handling will be using a number of different types of collisions boxes like   Kill Z volumes for the water, blocking volumes to stop the character from escaping the level, and trigger boxes to display instructions.


How-  I used collision detection and handling for instructions for what key to press the switch.


The basic function I want is: when the character begins to overlap with trigger box activate toggle visibility on. When the end of overlap toggle visibility off. When creating this function I found it a struggle to get it to function correctly. I used a tutorial called 'Unreal Engine 4 Tutorial - Interactable Button' (Tesla Dev, 2014to understand a way this function could be done. So I followed this tutorial's instructions only to find when testing it didn't work. 

After testing the function a number of times with no results I decided to use my initiative and create my own blueprint. Casting to third- person character so the blueprint knows what needs to overlap the box to trigger the event. I used a conditional statement like in the tutorial blueprint and my self-made variable called 'InTrigger' which makes the text visible and invisible. I used an 'InTrigger' set node for my begin overlap, I ticked the set node to registered in the branch as true. For the end overlap, I didn't tick the set variable which registered false in the branch node. In the end, I only added 'cast to third person character' and this blueprint didn't work. I decided to start again.


With the knowledge I gained from the tutorial and from trying it out myself I was able to create a blueprint that worked. I used Cast to third person Character from my own blueprint and the text render variable for the tutorial but the rest I found in the actor blueprint library. I used 'set hidden in game' node to hide the text when the player isn't colliding with the trigger box. I made sure that when the level begins the text will be hidden and only when the character overlaps with the trigger, the text becomes visible. This final version of the blueprint worked. 


Where - This trigger box will be placed over the switch so when the player gets near the switch the text will appear and tell them what to do.

Why - I purposely designed the beginning to give no instructions on how to play, I started the player off in the same environment to test the controls. With subtractive design I felt like giving instructions wasn't necessary. Fumito Ueda's (who popularised subtractive design) game 'Ico' didn't give any instructions but in a safe environment. 


 Next, I designed the jumping platform section to get the player used to jumping. I'm trying to design the level with flow channel in mind. When the player gets near the switch I decided it was too far of a jump to conclusions to expect the player to know what key to press. So I wanted the instructions to be clear. When you're near the switch text will appear saying 'Press E' so the player presses 'E' out of instinct. If I added to this game the next time the player sees a switch I won't need to give these instructions.


Industry expectations - 


After copying a blueprint from a tutorial, then changing it to make it work better and finally making my own blueprint. I think I have used industry practice in testing and refining a code for its efficiency. Using a concept from a tutorial and altering it to suit my purpose and make it simpler. Instead of anything overlapping with the trigger box, I have cast it to the third person character. 


Ready made libraries - When creating my own blueprint I used the node library to get this blueprint function I was able to use ready-made functions like 'OnComponmentBeginOverlap' and 'Set Hidden in Game' which were only available within the Actor class. 


Re-usability - I was able to duplicate the trigger box to use this function on both switches. I could easily re-use this blueprint, the main thing I would need to change is the 'Text Render' Variable to suit what I was hidden in another game.


Time Management


Starting off this prototype I see that I have a lot of tasks to complete, thankfully I have been able to complete one task today. I have 22 days left, so I'm still on target. It's still in the realm of possibility that I'll be able to complete the nine tasks in this amount of time.


Bibliography

Tesla Dev, (2014). Unreal Engine 4 Tutorial - Interactable Button. [online] YouTube. Available at: https://www.youtube.com/watch?v=CflZnd4u33g [Accessed 4 Jan. 2017].

unrealengine, (2014). Collision Response Reference. [online] Docs.unrealengine.com. Available at: https://docs.unrealengine.com/latest/INT/Engine/Physics/Collision/Reference/index.html [Accessed 4 Jan. 2017].